
Property Inspection Checklist for Singapore Buyers
A good property inspection in Singapore works room by room: ceilings, walls, floors, doors, windows, electrical points and plumbing, checked in daylight, with a torch, a coin and a spirit level, and with every defect written down with its location and a photo. This checklist follows that order. It covers new flats and condos at key collection, and resale homes before you commit, and it says where a visual check ends and a qualified professional should take over.
TL;DR
- Inspect one room at a time and in daylight, so surface faults and paint problems are not hidden by artificial lighting.
- Bring a torch, a coin for tapping tiles, a spirit level, a phone charger or socket tester, and a camera.
- Record each defect with room, exact location, description and photo, and submit the list before renovation starts.
- Use the first week after key collection for obvious defects, and keep checking through the 12-month defects liability period.
- Call a professional for moisture readings, concealed wiring or piping, and anything that needs calibrated tools.
Table of Contents
- Before you walk in: tools and timing
- The room-by-room checklist
- Common defects and how to spot them
- How to record and report defects
- When to call a professional
- Perspective: what we see at Register Today
- Buying or renting through Register Today
- For tenants: checking a rental at move-in and move-out
- A step-by-step inspection plan
- FAQ
- Sources
Before you walk in: tools and timing
Most inspections go wrong before the first door is opened. People arrive at dusk, with only a phone, and leave with a vague feeling that the unit is fine. A short preparation avoids that.
What to bring
The room-by-room guides written for Singapore buyers keep returning to the same small kit: a torch, a coin for tapping tiles and a spirit level. Add these:
- A phone charger or a plug-in socket tester, to test every power point.
- A tape measure, for gaps, door clearances and sizes you may need later.
- Masking tape or removable sticky dots to mark defects on the spot, so you can find them again.
- A printed floor plan, so each defect can be pinned to a room and a wall.
- A notebook or a spreadsheet on your phone, with columns for room, location, issue, photo reference and status.
When to inspect
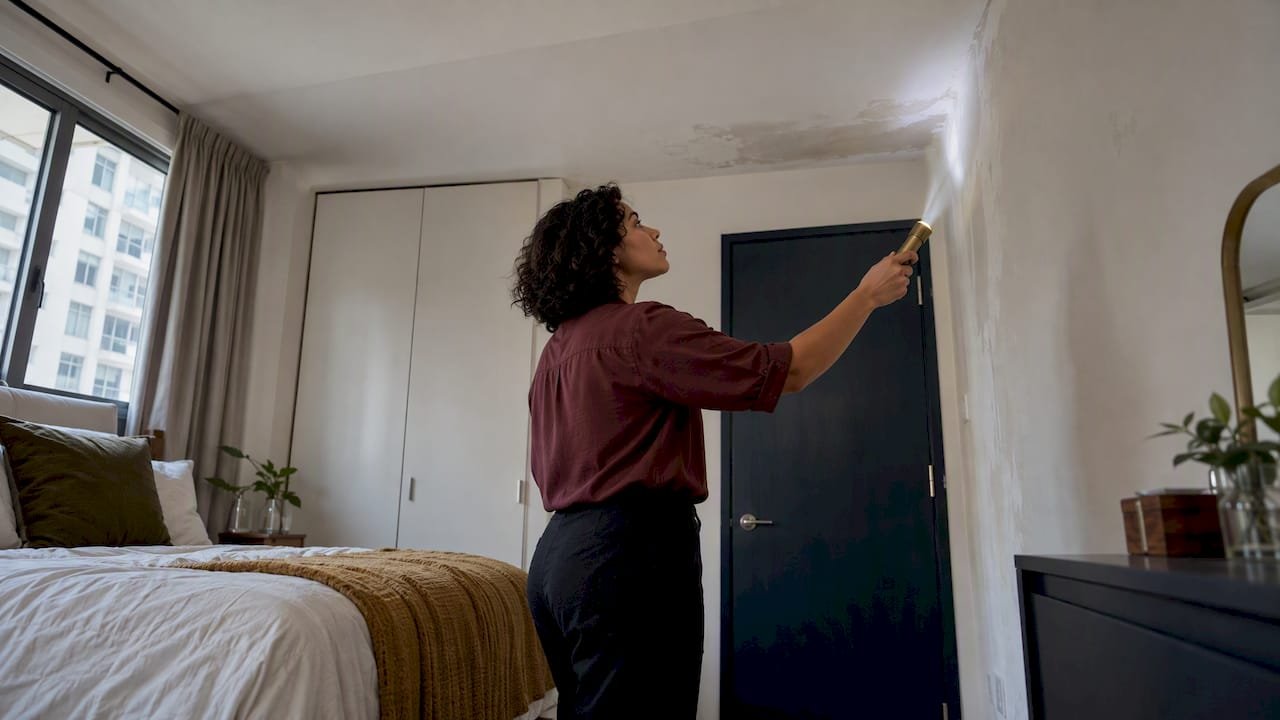
Daylight matters. Natural light reveals surface inconsistencies and paint issues that artificial lighting can conceal. Book the morning or early afternoon, and switch the lights off in each room first so you see the walls and ceilings as daylight shows them. Then use a torch held at a low angle along walls and ceilings: low-angle torchlight shows ripples, patching and uneven plaster that flat light hides.
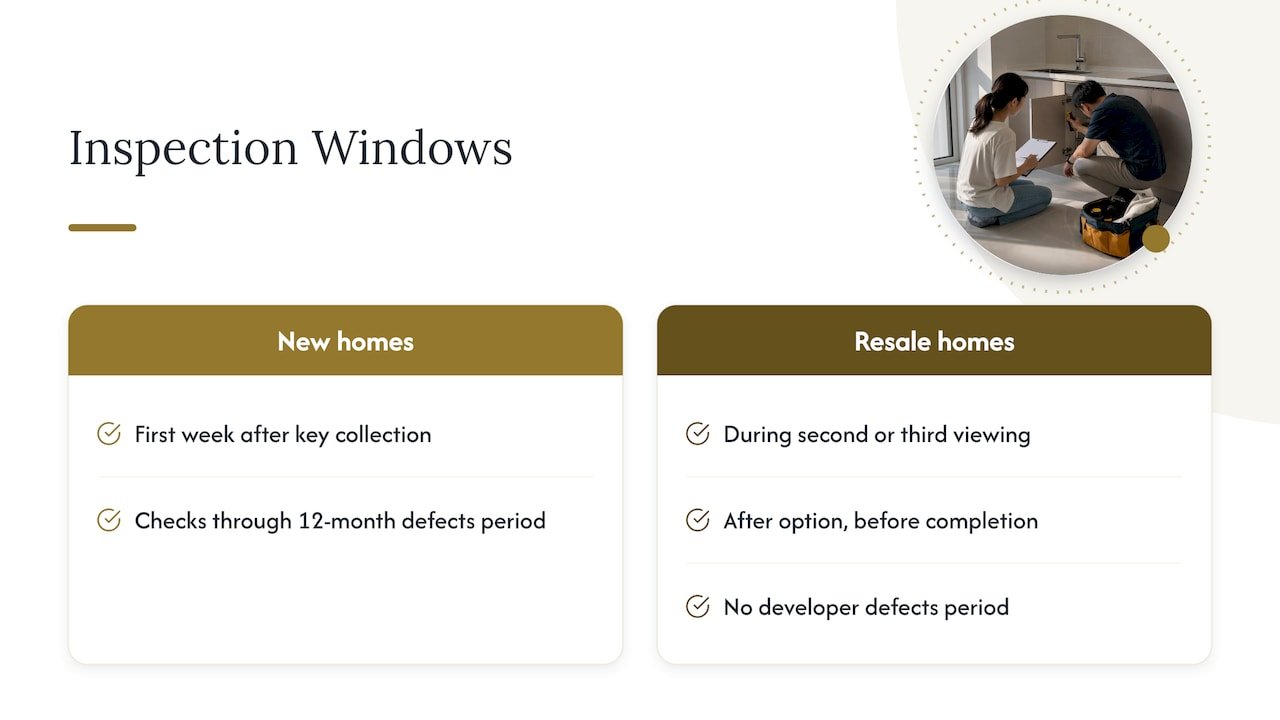
For a new flat or condo, the practical window is the first week after key collection, when you can identify the obvious defects, followed by continued checking through the 12-month defects liability period for issues that only appear with use, such as slow leaks or doors that start to rub. Keep the key-collection date on file, since the period runs from it.
For a resale home, the inspection happens earlier in the deal: during a second or third viewing, or after the option is granted but before you complete. Resale buyers do not have a developer’s defects liability period to rely on, so what you find before completion is your main leverage. If you are still working out the timeline of a purchase, our guide to the stamp duty deadlines Singapore buyers face shows how the dates fit together.
The room-by-room checklist
Work in the same order in every room: ceiling, walls, floor, doors and windows, then fittings. A fixed order is what stops you from skipping the corner behind the door.
Entrance, gate and main door
- Open and close the main door and gate several times. The door should swing freely, latch properly and not scrape the floor or frame.
- Check the door frame and the threshold for gaps, chips and uneven finish.
- Test the lock, peephole and any digital lock with every key or code supplied.
- Look at the floor just inside the entrance for lifted or cracked tiles.
- Check the distribution board (DB). Switch each breaker and confirm that the labels on the distribution board match the breakers they control.
Living and dining areas
- Ceilings: look for stains, hairline cracks, bubbling paint and uneven joints. Water marks are the most important find, because they point to a leak from above.
- Walls: run your hand along them. Check for bumps, cracks, uneven paint and water marks, and look along the surface with the torch.
- Floors: tap tiles with a coin. A hollow sound suggests a tile that has not bonded to the screed. The same checks flag missing grout and poor floor falls. Check for lippage, which is when one tile edge sits higher than its neighbour.
- Windows: operate every accessible panel and lock. Look for cracked glass, damaged seals, loose handles, missing components, frame damage and water staining.
- Electrical: test every switch against the fitting it should control and every socket with a tester or charger.
Bedrooms
Bedrooms get the same sequence, plus a few extras. Open and close built-in wardrobe doors and drawers if they are provided, and check that they are aligned and not catching. Test the air-conditioning isolator and the cable point, and look at the wall and ceiling around the unit position for stains. Stand at the window with the curtain rail position in mind and check that the window can open without hitting the wall.
Kitchen
The kitchen combines electrical and water risks, so it deserves more time.
- Run every tap, hot and cold if a heater is provided, and watch the drainage. Water should leave the sink promptly.
- Open the cabinet under the sink with a torch. Check for weeping at the traps and at the isolation valves, because slow drips show up here first.
- Check the countertop joints and the backsplash tiles for gaps, cracks and missing grout.
- Test the hob point, the hood point and every socket along the counter.
- Look at the ceiling directly under any neighbour’s kitchen or bathroom, where stains tend to appear first.
Bathrooms and toilets
Plumbing checks should cover water pressure, taps, flushing systems, floor traps and visible pipe connections. In practice:
- Flush the toilet twice and listen for a cistern that keeps running.
- Turn on the basin and shower together and compare the pressure to a single tap.
- Pour a bucket of water near the floor trap and the shower area. Water should flow towards the trap and not pool. Ponding is a sign of poor falls.
- Tap the wall and floor tiles for hollow sounds, and inspect grout lines and the silicone seal around the basin and bath.
- Check the door and its threshold, and test the exhaust fan or window for ventilation.
- Inspect the ceiling for stains or damp patches.
Service yard, balcony and utility areas
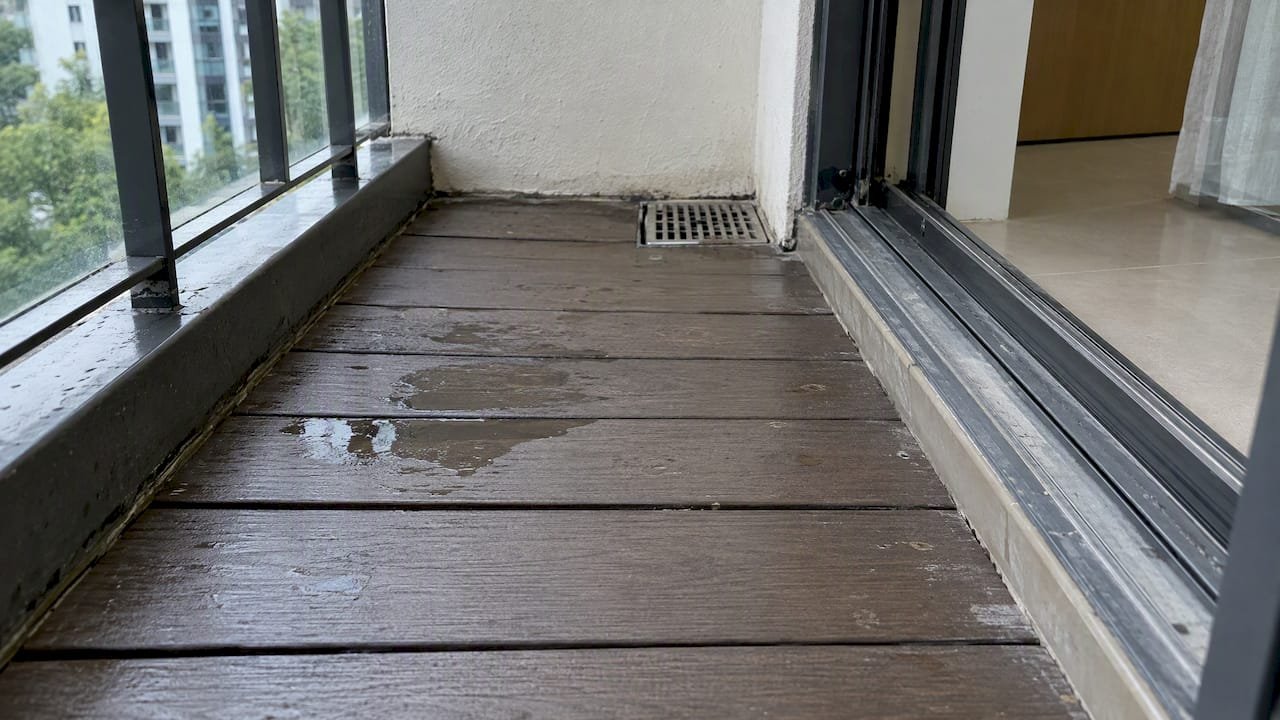
Check the gradient of the floor towards the drain, the condition of the railing and the waterproofing at the door threshold. If the home has a timber or composite deck, loose boards, standing water and uneven spacing are the usual complaints, and this guide to troubleshooting decking issues explains how those faults present. Run the washing machine tap and drain if there is a point, and check the clothes-drying rack fittings if they are included.
Common defects and how to spot them
The lists published for Singapore homes agree on a short set of recurring faults: cracks, uneven surfaces, paint bubbles, hollow-sounding tiles, misaligned windows and doors, non-functional sockets and switches, and signs of water leakage or poor drainage. The table below turns that into a quick reference.
| Area | What to look for | How to check |
|---|---|---|
| Ceilings | Stains, cracks, bubbling paint | Daylight, then low-angle torch |
| Walls | Bumps, uneven paint, hairline cracks, damp | Hand and torch along the surface |
| Floors | Hollow tiles, lippage, missing grout, poor falls | Coin tapping, spirit level, water test |
| Doors | Rubbing, gaps, loose hinges, poor latch | Open and close repeatedly |
| Windows | Stiff panels, damaged seals, loose handles, staining | Operate every panel and lock |
| Electrical | Dead sockets, wrong switch, mislabelled breakers | Charger or tester, DB label check |
| Plumbing | Weeping traps, weak pressure, slow drains | Run taps, flush, look under sinks |
Two habits help more than any tool. First, look at each defect from at least two angles, since many faults, such as ripples in plaster, only appear under side lighting. Second, photograph the defect with a wider shot that shows its position in the room, then a close-up. A close-up alone is hard to place later.
How to record and report defects
A clear record is what turns an inspection into a repair. The practical standard is to record each defect with its room, location, issue, photo and document reference. Another guide puts it as location, description and a photograph to support an organised rectification request.
A simple log looks like this:
| No. | Room | Location | Issue | Photo | Status |
|---|---|---|---|---|---|
| 1 | Master bath | Floor, left of shower | Water ponds, poor fall | IMG_0412 | Reported |
| 2 | Living | Window 2 | Lock stiff | IMG_0415 | Reported |
| 3 | Kitchen | Under sink | Weeping at trap | IMG_0421 | Reported |
For a new HDB flat, defects go through HDB’s current new-flat process, so check HDB’s official page for the submission channel before you send anything. For a private development, send the developer a dated list, keep proof of delivery, and keep every reply.
Report before you renovate
The order of events matters. Documenting defects before renovation means the developer remains responsible, whereas once work starts a developer may argue that later-found damage was caused by the contractor. Another guide gives the same advice: do not start renovations before submitting your list of defects, so that disputes over cause do not arise. Lodge the list first, and let your contractor see the dated record.
What the rules now say about developers
Buyers of new private homes have gained leverage recently. Under URA’s measures effective 22 May 2026, developers who deliver projects with major defects attributable to them, and who do not rectify them promptly after sufficient and reasonable notice, can have sales suspended. URA will also impose a no-sale licence condition on future unlaunched projects for up to five years for suspended developers. The practical lesson for you is that written, dated notice of defects is the step that starts that clock, so a well-kept log is worth the effort.
When to call a professional
A visual check catches what you can see. It will not catch what is inside walls or above ceilings. Defects requiring trained judgement or calibrated tools are for a professional, and in practice that means moisture readings, functional testing and photographic documentation. Hidden problems, such as the functioning of mechanical and electrical fittings and the condition of pipes, conduits and trunking, are harder for an untrained eye to identify.
In plain terms, bring in a qualified person when:
- You find a damp patch and cannot tell whether it is an active leak or an old one.
- A socket or switch behaves oddly, trips a breaker or feels warm. Ask a licensed electrician.
- Water pressure is poor in several fixtures at once, which may point to a supply issue.
- Tiles sound hollow across a large area, not just one or two pieces.
- The unit is a large resale purchase and you want an independent report before you exercise your option.
The cost of a professional check is small next to the price of a home, and it is usually most useful before you have committed, when the findings can still change the price or the decision.
Perspective: what we see at Register Today
We work with buyers, sellers and renters across residential and commercial property in Singapore, and the same pattern repeats. Inspections fail less from missed defects than from missing records. A buyer spots a stained ceiling, mentions it to someone, and three months later nobody can say when it was first seen.
Our advice is to treat the inspection as part of the transaction, not a chore after it. Compare the unit against what you were promised, note everything in writing, and keep the dated photos next to your purchase documents. For investors, the same discipline applies to commercial units: check the zoning and the use of the space before the physical walk-through, since a sound unit with the wrong classification can still cost you. Our guide to zoning checks for commercial property covers that side.
We also encourage buyers to put the inspection inside a wider decision. Condition affects price, and price affects what you can afford. Our buyer checklist for the 2026 market sets out the other questions to settle before you commit.
— Anderson
Buying or renting through Register Today
If you are comparing homes, we list residential and commercial properties, and our team can help you shortlist units worth inspecting, negotiate on the price and arrange viewings. Sellers can also start with a free property valuation to see where their home stands before listing.

Browse residential listings or commercial listings, or request a free property valuation. For general questions, start from the Register Today homepage.
For tenants: checking a rental at move-in and move-out
The same discipline protects tenants. At move-in, walk through with the landlord or agent, run the same room-by-room list and attach photos to the inventory, so that existing marks are agreed before you sign. At move-out, repeat the walk-through against that record: test appliances, taps and lights, check that cupboards open and close, and note any damage to surfaces, then compare condition with the move-in photos. Landlords checking a unit usually look closely at the front door, floors along skirting boards, and walls for scuffs, so a clean, repaired unit helps your deposit discussion.
If a dispute over deductions follows, a dated photo record is your strongest evidence. Our guide to tenant rights and preparing a Small Claims Tribunal claim explains the process, and expats new to renting can read about renting in Singapore as an expat.
A step-by-step inspection plan
- Prepare: charge your phone, pack the kit, print the floor plan and book a daylight slot.
- Walk the whole unit once without testing anything, to get an overall impression and spot major issues.
- Inspect room by room in a fixed order, ceiling to floor, marking each defect with tape.
- Test systems: every switch, socket, tap, flush, door and window.
- Log and photograph each defect with a wide shot and a close-up.
- Decide who handles what: items you can report directly, and items for a professional.
- Submit the list in writing before any renovation work starts, and keep proof.
- Re-inspect during the defects liability period for faults that appear with use, and confirm each repair is closed before you sign off.
FAQ
How long does a proper home inspection take?
Allow two to three hours for an average flat if you test every fitting. A larger condo or landed home takes longer. Rushing is the main reason defects are missed, so do not combine the inspection with other errands.
What is the best time of day to inspect?
Daytime, in natural light. Daylight shows surface inconsistencies and paint problems that artificial lighting can hide. Turn the lights off first, then use a torch at a low angle along walls and ceilings.
Should I start renovations before reporting defects?
No. Report defects first and keep the dated list and photos. Once renovation begins, the developer may argue that later damage came from your contractor, which makes it harder to have the fault rectified.
Can I do the inspection myself, or do I need a professional?
You can check visible items yourself with a torch, coin, spirit level and charger. Hidden faults, such as concealed wiring, pipes and moisture behind finishes, need trained judgement and calibrated tools, so use a professional for those.
Where can I find a printable checklist?
Several Singapore firms publish room-by-room defect checklists for BTO, HDB and condo handovers, such as this printable defect checklist. You can also copy the tables in this article into a spreadsheet and adapt them to your unit.
Sources
- Singapore Defect Check Toolkit
- BTO, HDB and condo defect checklist (PDF)
- Taking handover of a landed build: room-by-room defects
- Home inspection in Singapore: a practical buyer’s guide
- HDB handover inspection checklist: BTO and resale flats
- Expert guidance for detecting home defects
- How to check your new home for defects
- URA: new measures to enhance protection of home buyers
- Troubleshooting decking issues